13.2 專案原始碼分析(C#)
Step 1. 下載 SonarQube Scanner for MSBuild,解壓縮至任意目錄下。

Step 2. 編輯 SonarQube.Analysis.xml,設定 SonarQube server 位址及帳號登入資訊。
<Property Name="sonar.host.url">http://localhost:9000/sonar</Property>
<Property Name="sonar.login">myaccount</Property>
<Property Name="sonar.password">mypassword</Property>
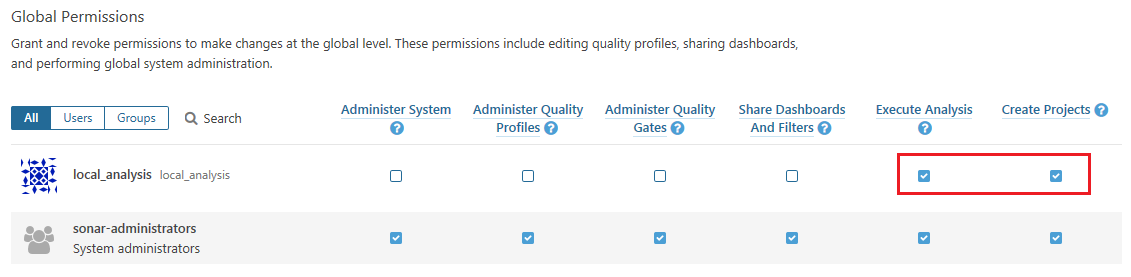
Step 3. 分析原始碼功能預設開放給所有 user 使用,如果要更改這項設定,請在 Web 介面維護帳號權限資訊。允許分析上傳至少要勾選 ”Execute Analysis” 權限;當 ”Create Projects” 未被選取,Scanner 將無法自行創建不存在 Server 上的專案。
Administration -> Security -> Users -> Create User
Administration -> Security -> Global Permissions
Administration -> Projects -> Management
Step 4. 開啟 command line,執行原始碼分析步驟如下:
執行預處理程序,產生 SonarQube 暫存目錄 (version 參數必須每次遞增)
指令:
[Scanner安裝路徑]\MSBuild.SonarQube.Runner.exe begin /k:"[key]" /n:"[name]" /v:"[version]"範例:
D:\sonar\MSBuild.SonarQube.Runner-2.1\MSBuild.SonarQube.Runner.exe begin /k:"AHC" /n:"AsusHealthCare" /v:"1.0"呼叫 MSBuild 執行專案編譯 (需先切換至要分析的專案目錄下)
指令:
"[MSBuild安裝路徑]\[版本號]\Bin\msbuild"範例:
"C:\Program Files (x86)\MSBuild\14.0\Bin\msbuild"分析原始碼及上傳結果,必須在與第一步驟相同的目錄下執行此指令
指令:
[Scanner安裝路徑]\MSBuild.SonarQube.Runner.exe end範例:
D:\sonar\MSBuild.SonarQube.Runner-2.1\MSBuild.SonarQube.Runner.exe end
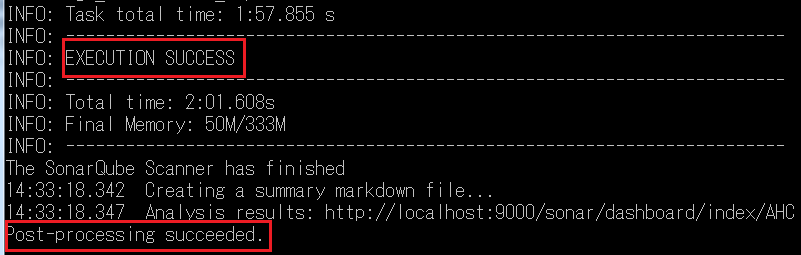
分析完成後提示成功訊息。
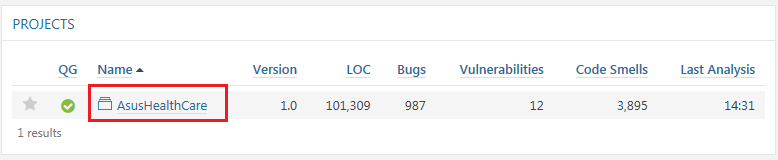
Step 5. 開啟 SonarQube Web,從 Dashboards -> Home 或是 Measures 可查看原始碼分析結果。